User Tools
Table of Contents
UniversalMediaServer via Container
This tutorial will show how to setup UMS as a container for a QNAP1655 with QuTShero and ContainerStation.
What is UniversalMediaServer (UMS)?
Universal Media Server is a free DLNA, UPnP and HTTP/S Media Server. We support all major operating systems, with versions for Windows, Linux and macOS. The program streams or transcodes many different media formats with little or no configuration. It is powered by FFmpeg, MediaInfo, OpenSubtitles, Crowdin, MEncoder, tsMuxeR, AviSynth, VLC and more, which combine to offer support for a wide range of media formats.
Download the Image
Open your WebUI and the app ContainerStation.
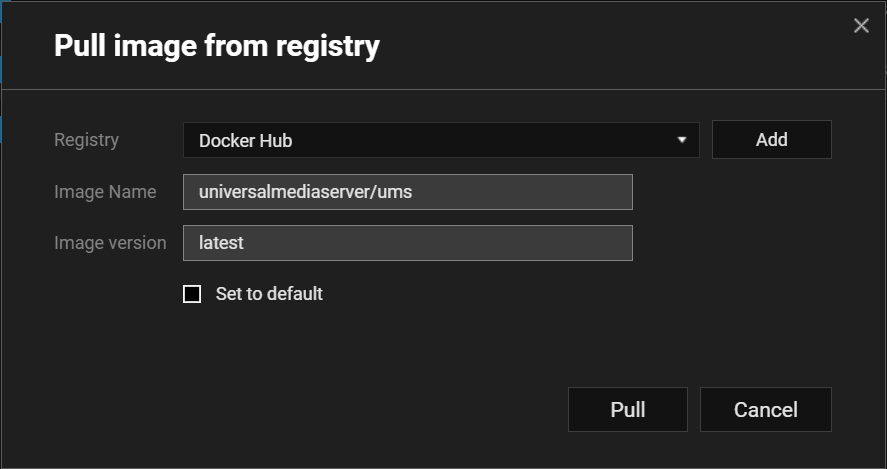
Go to “Resource” → “Images” and select “Pull”
Enter the downloadlink (from Dockerhub UMS) and a version (eg latest)
Create a Container
After downloading the image you should now see it in the images window
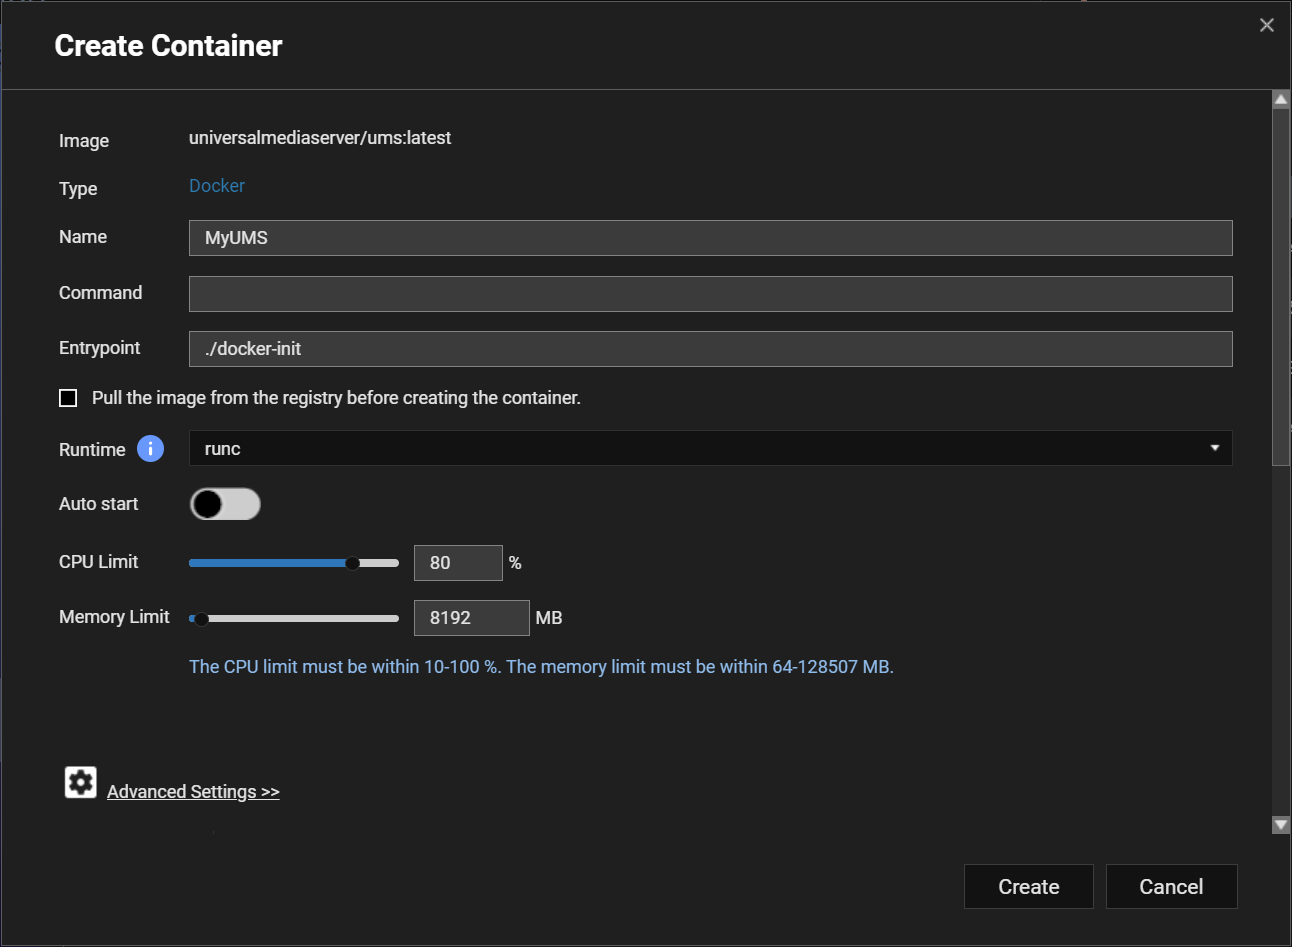
Click on the “+” in the “Actions” tab
Set a name of your choice, also set some CPU and memory limits, these can also be changed later if set to low.
If the container should be started with your QNAP, select “autostart”
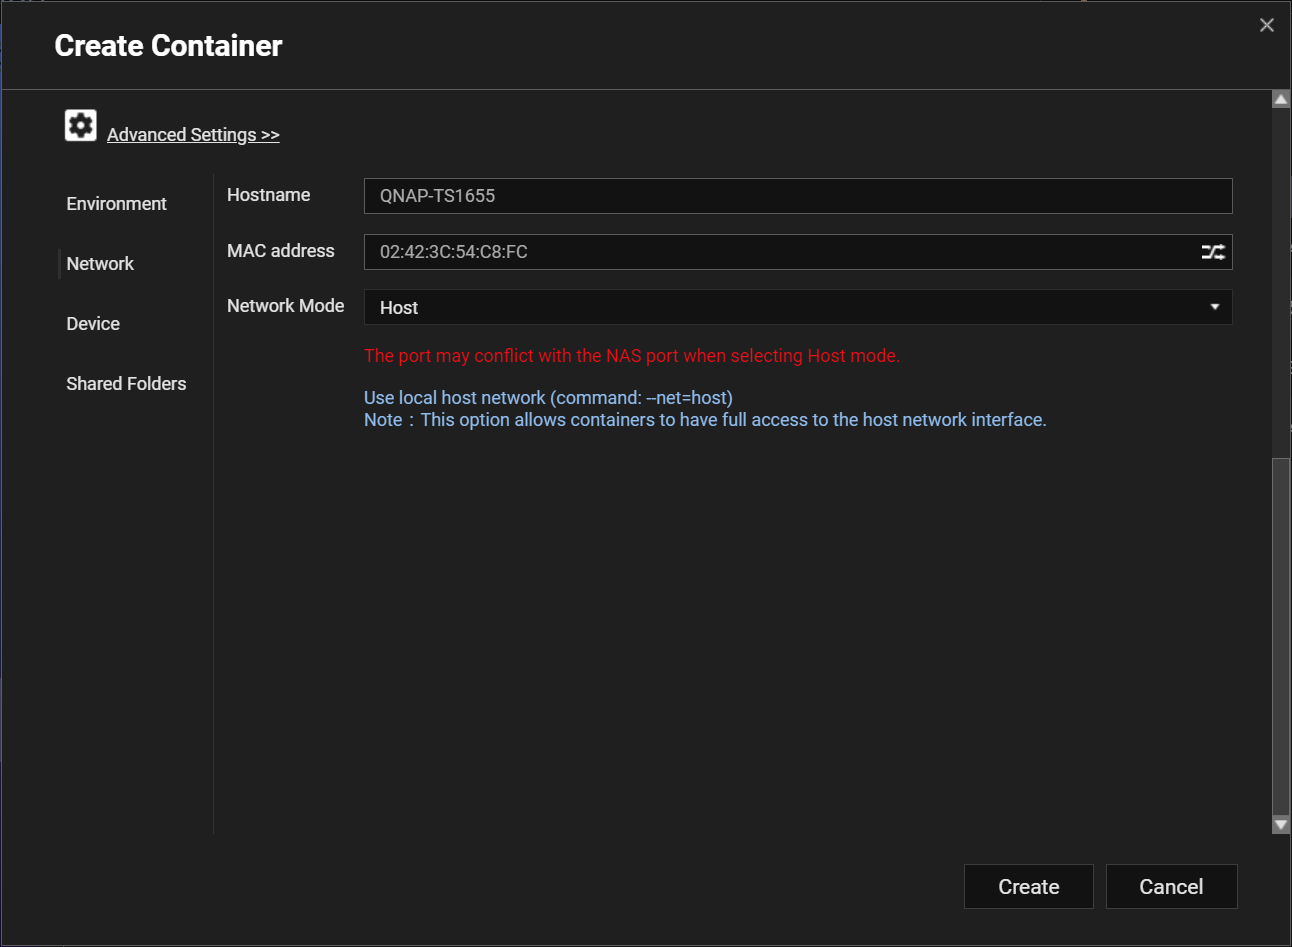
I have set “Network” to “Host”, otherwise I wasnt able to connect to the UMS WebUI and couldnt see the UMS on my TV/PC.
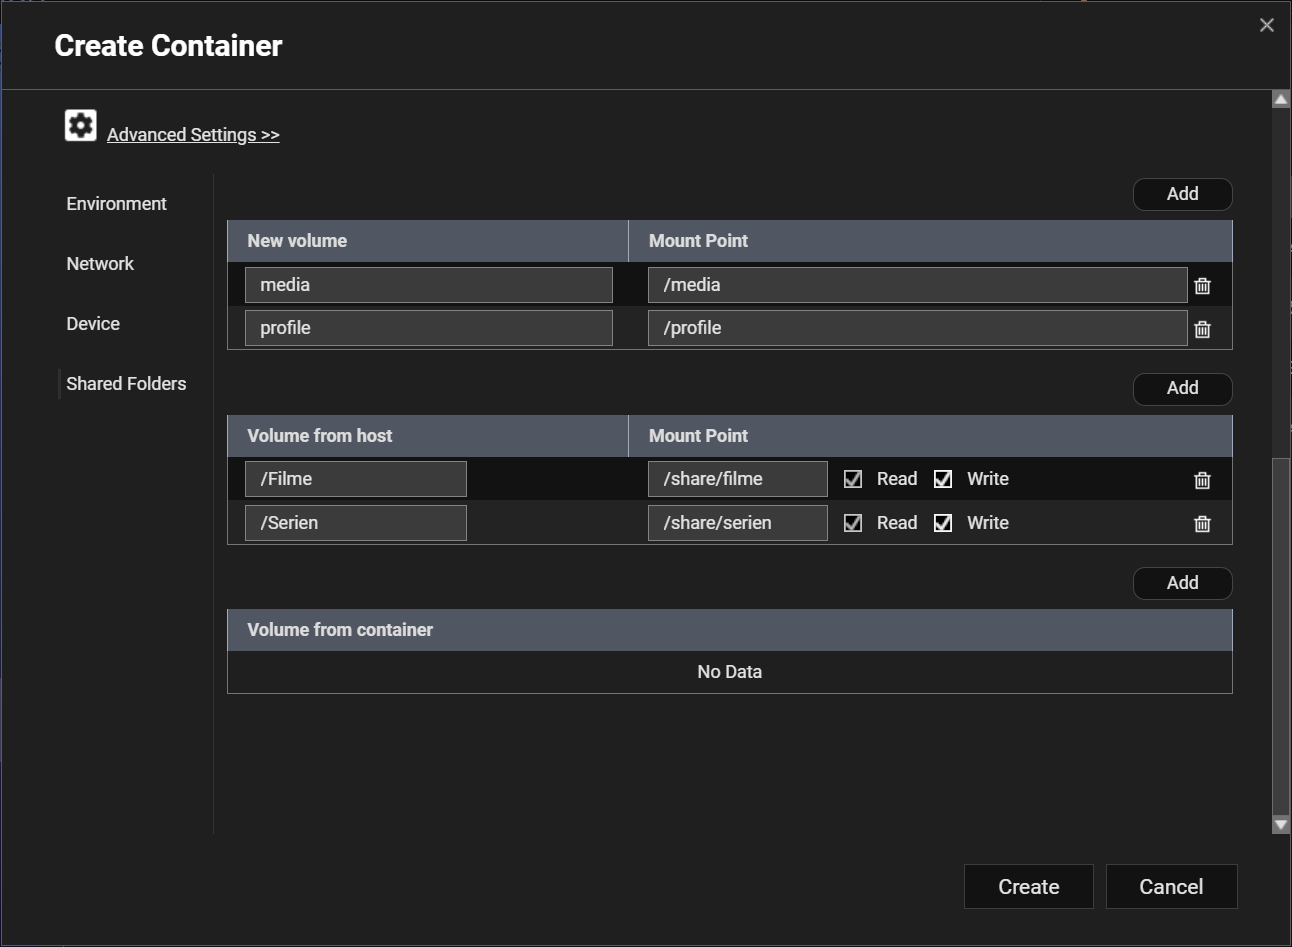
Set the shared folders so you can access your movies etc from inside the container
Access the WebUI
UMS usually uses Port 9001 which isnt used by QNAP
To access the WebUI, go to <yourQNAPIP>:9001
If that doesnt work, you can check your current container IP and ports.
To do this, go to “Resource” → “Container” and select the terminal icon in the “Actions” tab
Enter “/bin/sh” and click connect
You can now use this shell to enter “ip a” to show your IP (usually “qvs1”) and “netstat -tulpen | grep java” to show your ports.
It should look like this
If it doesnt you should check if the port is already in use by anything else
Configure UMS
After entering the WebUI you have to set an admin account.
Then go to “Shared Content” and set the folders with your movies etc
Go to “Server Settings” and tick “Show advanced settings”.
In “Services” you can set a servername, this shows up on your TV.
If your Mediaserver doesnt show up on your TV, make sure to force the network interface in “Network settings (advanced)” to “qvs1” or whatever your network device with your QNAP IP is named.
In “Navigation Settings” → “General Settings” I usually set “Enable video resuming” and “Hide empty folders”.
In “Virtual folders / files” I show “Media Library”, “Recently Played” and “#–TRANSCODE–#”. Transcode lets you play movies without using ffmpeg etc, sometimes this works with movies that have audio/videocodecs which cant be played
In “Transcoding Settings” → “Common Transcode Settings” select the tab “Audio Settings”. You can set “Keep AC-3 tracks” which can usually be played by any TV, unset “Keep DTS tracks” because DTS fail to play by most TVs.
You can also set the “Audio language priority” to your specific language (eg “ger,eng”).
In “Subtitles settings” feel free to set your priorities if you need them. For “Audio/subtitles language priority” I use “eng,off;ger,off;” which means that if lang is “eng” or “ger” dont use subtitles.


